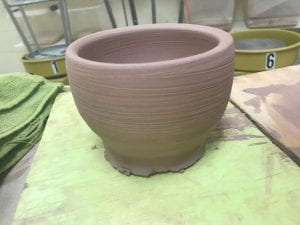
For this blog post I recently began to research on how to throw a teapot set. There are many videos with different methods for how to throw teapots and there are also different forms. I used the artistic tool artists research and watching videos on Youtube of how to throw teapots and many different methods came up. My favorite video so far was from ‘KaranPotsandGlass’ because she was pretty basic with all the methods she used. I then began to write notes of the video and payed close attention to her hand positions and measures when she was throwing the teapot. She created a short and wide teapot and earlier when I was throwing vases I had the tendency of making them pretty short so I thought this would be a good fit.
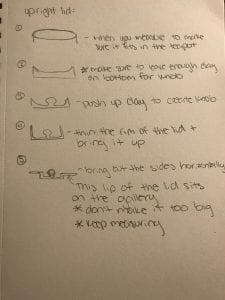
I then began to sketch out how I wanted my pot to sit with the handle, spout, and lid. In the video she created two different types of lids. One was called the upright lid and the other was called a flange lid. I am going to create the upright lid because I like how it adds different shapes and dimensions to the teapot and gives it character. the first day I started throwing my pot was not the best because I wasn’t used to using three pounds of clay and that is what was suggested for making a decent sized teapot. I am going to use the artistic skill artists reflect and look into what I am doing wrong that is creating the opening to my teapot too big and fix it as I keep practicing and throwing more.


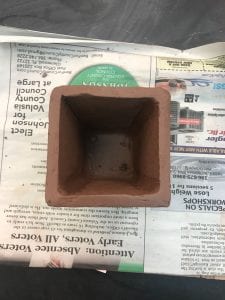
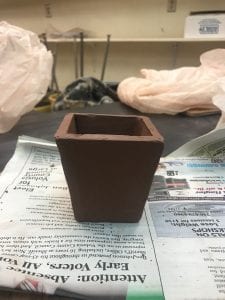
 For my final clay form of my project when I got surprised with two chocolate lab puppies I began making a pinch pot. When I was creating the pinch pot the clay kept cracking and it became uneven. I was trying to make the pinch pot fairly large so I could put the puppies in them but it did not turn out how very well. I thought maybe I could start making it as a coil pot so that I could really control the circumference of the laundry basket but I realized that was going to take a pretty long time. I later came up with the idea of making the laundry basket out of four slab sides to create the dimension of a square-ish shape. I cut out the slabs and it actually turned out better than I expected, the sides were clean and it was just as wide as I wanted even though I didn’t measure it before I put the slabs together. I am now starting to shape the dogs to attach them to the laundry basket. Shaping the head is pretty easy but I still don’t know how to make the noses of the dogs. I plan on going on youtube to find good techniques to make the dogs noses look cute just like they were when I was surprised with them. Over the two dogs I plan on making a thin blanket like they are hiding but then their heads poking out.


 To start off with the year we all began to create letters for the library. I got assigned in a group with four other people to create the letter F. The structure design of the F was a little confusing because of the way the curve at the top was so it wouldn’t fall over when standing staging up. We had trouble getting all the slab pieces attached because some weren’t the right fit. We solved the problem by making a new slab and measuring the length and width of where they needed to go. After we attached all the pieces we started to sketch dazzle camouflage designs for what we would glaze. Everyone sketched multiple designs and then we compared ours. We all met at our table to collaborate and discuss which design to use and figured out we are going to make a mixture of a couple prints.


 For this blog post I have been working on a new piece and I have also been working on taking good pictures for my finished tea cups. I got my tea cups out of the kiln a couple weeks ago and I wanted to take pictures of them with a backdrop that would compliment the colors of the vibrant flowers on the tea cups. I knew that there was a blue back drop in the room but I didn’t think that would have looked the best for the reds, pinks, and greens in the flowers. So I used the artistic behavior: Artists Solve Problems to find a place in my house to take pictures of my tea cups with a clean white or tan backdrop. I eventually found the correct spot and took decent pictures. For the new project that I have been working on I used artists research because I looked up online pictures of octopuses because I am creating a slab built lantern with an octopus at the top corner of the lantern. As I started creating the octopus that would go on my lantern I had to pay great attention to the details on the creature in real life. Their heads are shaped very interestingly being a little lopsided with the part wear their brain is so that was very difficult to create the correct shape of the head. I still haven’t created the tentacles but I think that part will be very difficult because of the suctions they have on the bottom if their tentacles and I am still figuring out how I will create them.